Showing posts with label RAKS. Show all posts

Sunday, January 8, 2017

A couple Raks - Made with Altenew Layering Stamps

Hello Peeps.  Happy Sunday Evening to all.  Hope those of you getting the really cold weather are staying warm....  I made a promise to myself that this year in 2017 that I would start sending out more RAK Cards.  So I made 2 today for no other reason but to just let someone know I am thinking of them...  I used the Altenew layering stamps Beautiful Day set.  And I used Tim Holtz distress inks mini's to ink them all up.  All in all I am very happy with them.  No to get them addressed and out in the morning post.  Thanks for popping by and visiting.


 Until Nest Time,
 Tootles

Wednesday, December 23, 2015

Last Minute Holiday Cards

HI everyone.  I made a 3 more quick cards, rec'd some from friends and wanted to send some love back.  The items used to make the cards came from a Deb over at Society of Stampaholics , I won a challenge and the package included a ton of cool goodies to make cards with, Thanks Deborah!  Here are the cards, I made with them all in less than 30 minutes total....... The green and red background on the 1st  card was done with brusho powders on card stock.  Love my brusho powders!  


                Stamps used are from Stamp of Approval set, love these too.
     

        Gold Snowflakes are dies from Stamp of Approval set also.....


OK so that's it for me today.  House cleaning and Pet Sitting are calling my name.  Thanks for popping by and looking.  Have a fabulous day!

Until Next Time
Tootles

Wednesday, June 17, 2015

100 yrs Old! Amazing......

So I a friend contacted me to ask if I would make a card for her Neighbor who was turning 100 this month.  She was contacting everyone she knew who made cards . This gentleman, James, was a WWII vet, he was in the Navy and was a radio man.  He could morse code 30 words a minute, which I have been told is amazing to do!  So unsure what to do for his card I waited til the mood stuck and here is what I came up with.......


Happy 100th James!

Until next time
Tootles

Tuesday, June 24, 2014

July 4th cards and 1 birthday

Hello all my crafty peeps.  Just showing a few more cards I made.  Need to really get my card giving stash back up I am down to just a few Thank You cards and that just won't cut it!  Anyways here are my recent makes:  


OK so these are nothing fancy but still fun to make and that's the most important part, right, enjoying what we make.....

Until next time,
Tootles

Tuesday, March 4, 2014

Another RAK (Random Act of Kindess) Card

Hello all.  Boy have we been having a few days of cooler weather here in TX 43 right now.  But at least we don't have snow and below 0 temps, thankful for that much.  Well as you all know my card group has a weekly challenge, just for fun and here is my card for last week.  It was to be a card for a male and we had to use 4 items from a list of things.  I chose grey card stock, nature stamp, embossing folder and gate fold.  And here is the card.  
 So  I started by making the gate fold card base then embossed front flaps only.  Used SB EF.  I then added the grey and Yellow scrap paper from my stash and also added a few black gems to opposite corners.  Die cut a the white frame and cut grey card to fit inside the middle and stamped in black Momento ink the Poppies from Just Right Stamps, and attached this to one side of the front flaps.  I decided it needed more pop so I added more black gems to frame it a bit and the little tiny white flowers and a tiny white bow (from Wal mart sewing section).  Not sure how manly it is but there you have it.  This going to card making friend, who is male, and is a retired art teacher and who makes wonderful cards also.  The inside of the card says " You are in my garden of friends".     

That's all I have for now.  Still need to get my card for this week's challenge done, but I have been trying to organize my craft area and we all know how that can go, LOL.  Wish me luck.

Until next time
  Stay warm, where ever you are
 

Wednesday, February 19, 2014

Just a little RAK

Happy Hump Day all.  Well I rec'd my new Grand Calibur Machine and it came with 5 new die sets, none of which I had, Yay for me.  So I made a RAK for a new Card-making friend,  now I am not thrilled it came out, but that happens sometimes.  The ideas in our minds don't always turn out as we think they will, lol.  So I used one of the new dies I recieved called Whimsical Tree, very cute! Colored it with a dauber and pear tart momento ink.  Embossed half of card front with my fav EF polka dots.  Added some green ribbon and pearl and green bling, then added more pearls all around edges of card. Also ran the pear tart in over the raised dots on bottom half of card.  Then stamped oval frame and sentiment from Just Right Stamps in pear tart again.  I think in future will use dark green color for sentiment, it's a little hard to see in person.  But all in all it's a cute card I guess and here it is:


Well that's it for now, off to see what else I can make with the new dies.  Thanks for stopping by and leaving some comment love.  

Until next time,
 Happy crafting

Monday, October 14, 2013

Alittle late but got it in

Hello everyone.  I had to play and create a card for the Tuesday Color Challenge over at OUTLAWS Challenge site.  I have missed playing along for a very long time and the colors this last week were just to pretty to not play, so I made my card and just got it in on the last day, today, better late than never as the saying goes, LOL!  The color theme is below and my card follows, the twist was to make it Autumn or Fall related.  


Also used this card for my weekly card group challenge, where we had to use 1 stamp 3 times.  Some card friend will be getting this as a RAK soon.  I will be adding the other few fall cards later today or tomorrow so be sure to check back soon.  :


Entering in the following Challenge(s):

House of Gilli - Anything goes/ Fall 

Lady Anne"s  Challenges -  Fall/ Autumn

Make it Monday - Paper Craft Project


Until next time,
Tootles

Sunday, October 13, 2013

Some more Cards

Hi there all you crafty peeps.  As promised I am back with some of the cards I made while I was AWOL, Lol.  Not in any particular order here they are.  


As you can see I am getting Christmas cards started now.  I usually send out about 60 handmade cards.....so I have start early, LOL.  Well that is it for now.  Working on some Fall cards now will show them soon.  Thanks for coming by and I am so happy to be back blogging again......
Be back soon


Friday, October 11, 2013

I am back finally!! Woohoo

Hello, Hello, Hello, and a very Happy Friday to all my crafty friends. I am finally back to getting a little crafty.  Not sure if I mentioned before that my DH and talked my parents into selling their home in Florida and moving here to Texas.  Well they did and it sold in August.  Now I should explain why we wanted them closer.  They are getting up in age (77 & 89) and my Step dad had Alzhiemer as does my MIL that lives with me and DH.  My mum is a bit younger than pop and they really had no one to assist with the house needs and not mention with their health needs.  So as of Aug. 19th they have moved to Texas.  They wanted to rent, so we found them a very nice duplex on the lake about 9 minutes from my house.  It was a hard move but so worth it.  Pop has fallen several times and it was awesome to be able to run over and pick him up for mom.  And yes we have ordered a gait belt to make it possible for her to get him up.  I believe they are happy here now, it took a while for them to feel like this is home, but they are adjusting fairly well.  I think it's me and DH getting used to have to run them everywhere from doctors, to shopping to just plain getting out, since pops can no longer drive and mom never has driven.  It's starting to all come together, I think.  And I am happy to be able to see them everyday if I want.  Here's a picture of them the first weekend they arrived, we had gone to lunch at a local pub.

 And then one of me and my Mum, isn't she just adorable
 So that is why I have been AWOL for a bit.  I have made a few cards here and there though, will be posting them soon.  Oh and my mum is a crafter also, so we can share all our stash now, yippee! OK now I will leave you with a card I made for my card groups weekly challenge. It was a card we hade to case and here is mine.

Entering this card in the following Challenge(s):


I'll be back later today hopefully to show you all the missing cards I've made while away.
Have a wonderful Friday!  Glad to be back Crafting.


Until next time 
Tootles 

Wednesday, June 26, 2013

Another New Card

Evening Peeps! I have been busy crafting cards this week, still need to finish 3 DT cards and come up with a Welcome to TX card for my parents who are moving here, YAY!  And DH is away til the weekend so I have a lot more time to craft.  The card I am going to show you now I made for my card group challenge.  It will be a RAK (random act of kindness) for someone in another Card Group.......  First I Punched the border with Friskars Bubble punch, added a backer card colored with Copics to match the tiny buttons (from Micheal's) added down the side in bright cheery summer colors.  I then embossed the buttons and stitching with Cuttlebug  EF's (embossing folders) and lightly colored them with chalk.  Added alittle faux stitching around the card edges and then the sentiment was attached.  That's it easy peasy......... So here it is:


 I still have a lot of cards a to make and share so it's going to be a busy week crafting here :)  Thanks for popping by and viewing my cards, makes me happy to share all my creations with you all.

Until next time,
 Don't let the bed bugs bite...................

Tuesday, March 19, 2013

Another new technique I learned.....

Hello all.  I just have to share with you a new technique I learned this week from another online card making friend.  I really had fun with this one.  It's called Burnished Micro Glitter, maybe you've heard of it or even tried it, but I had not. And I just had to try it out.  

First a Tip: It's tricky when you first start...try not to touch the sticky stuff on the Sookwang paper
use the covering paper that says Sookwang to hold your sheet while attaching sticker
 
You start by cutting card stock to the card size you want.  Then you attach your card stock to one side of the sticky Sookwang. Then remove the sticker from it's backing...carefully...and don't toss the negative as you can transfer that with transfer sheets as I showed yesterday.  Now remove the backing from the sticky side of the Sookwang, place your sticker where you want it.  Then using a coffee filter cover the entire sticky side with the sticker on with the warm highlights micro fine glitter.  You then take your finger and rub the glittter into all of the sticky parts and the sticker.  It will start to feel velvetty like and not rough and that will tell you it done. Then you can shake the left over glitter back into its container.  Now you color with copics or other alcohol markers.  Be careful to use a light hand when coloring and do not press hard just go lightly and carefully, the alcohol markers can bleed thru if not careful.  Takes a little practice but is oh so fun!
 
 WaLa you have a card front!  Here is the sticker image and the card:


 OK so now all you do is build your card.  That's all there is to it.  Fun right?  I really like this and will be doing more of this technique for sure.  You can get more info on this technique by searching You Tube for "Burnished Micro fine glitter technique" videos.  And you cane get the supplies at Elizabeth Crafts and/or Frantic Stamper, both have online stores.  I have also heard some stamp stores carry the stuff too but you will have to do your homework to find it.  Hope you enjoyed this technique b/c I sure did.

Have a great day...


Until next time.
Tootles

Monday, March 18, 2013

New technique to me....

Hello, I must first off welcome another follower to my blog.  Thank you from the bottom of my heart. 
Now I decided to try something new to me that i found out from a fellow card maker and friend. This technique uses the negative part of stickers.  You know what's left on the paper backing when you use the positive sticker image.  So don't toss these out you can still use them.  Here is a card I did with the negative sticker image.  It's very CAS and I actually really like it. Here it is: 
It's really cool and easy to do.  I used some sticky transfer paper called Stardust.  You peel the backing of and add the negative sticker to it and put the sticky side back on the backing paper and burnish the image with a bone folder. Make sure you do this very well than take the backing off and stick it to your card or what ever you want it on.  Then just peel the Transfer paper off carefully.  It can re -used so do not toss it.  I put my sticker on some card stock and circle punched it out and attached to the card front with foam dots.  I also scored some lines to top left and bottom right sides of card front.  I then decided it needed a bit more so added the negative of a few flowers stickers, done the exact same way as I did the center sticker and added to black gemstones too. And Voila, you have a card.  It was something different to try.  The stickers are from Elizabeth Crafts as was the transfer paper.  A friend had given me a few supplies from her stash for me to try the technique out and I do think I will be ordering more, it was fun to make. 

Do drop back later this evening or possibly tomorrow for another new technique to me it's called "Burnished Micro Glitter" I believe and it is a lot of fun too.  See ya soon.  And thanks for coming by for a visit!

Until next time,
TTFN

Monday, March 11, 2013

Thank You card cased challenge

 Hello everyone, Happy Monday.  I was needing a to make a Thank You card for a friend and then I noticed that Card Camp a yahoo group I belong to was having a Cased Card Challenge this week. The above card is the card we were supposed to case.   Here is my cased Thank you card. 
That's all I have today.  Have fabulous day!

Until next time,
 Craft on.....

Monday, March 4, 2013

ST. Pat;s Day Fat Card

Hello all you crafty peeps.  I made my 1st Fat Card today.  This is a fat card for a St. Patrick's day, and it's going to my step dad.   I used an freebie image from Robyn's Fetish, she creates some really fun digi stamps. And this leprechaun is one of hers.  I just thought he screamed St. Pats...... and here is the card.

OK, Now I can get on with more Easter Cards.  OHHH and I almost forgot I have to brag a bit (blushing)
my Easter Egg Cards from last week that I made where both feature cards on 2 of the Groups I belong to, WooHoo.....Sorry It's so nice to be recognized for a card.  One is featured on the Card Camp Group Site and the other is on the Outlawz Group.  It sure felt good to see them there today.  OK I'm done bragging on myself, LOL.  Alright stopping with the chatter and time to start thinking about Easter Cards.  I send a lot between family and RAKs for Card making friends so I better get busy......

Until next time
 Happy Card Making

Thursday, February 28, 2013

More Easter and St. Patrick's Day

Good evening all.  As I promised I am back with two more cards to share.  I made another Easter card and a St.Patrick's day card for my step Dad.  The first card is similar to the other Easter Card but it's just A4 die cut with the grand nestabilities oval and embossed.  Added some orange and green flowers and spellbinder Leaf die cuts.  Used a Fancy Tag die and of course added more bling rhinestone swirls  The Shamrocks card is very basic, just patterned shamrock paper cut slightly smaller than the card base. Added small panel of dark green paper with 2 - 3dimensional shamrocks and a bit of green twine.  Like I said very basic, but suits my needs.  Now here are the cards:


Well that's all I have for you tonight.  But do check back tomorrow morning for another Card for the Challenge that's starting at the Stamping Shack where I am a DT member. 

Until next time,
  Sweet dreams

Easter Cards

Hello there crafty peeps.  I am just popping right quick to share 2 cards I made today.  Both are Easter cards and 1 was for a challenge and one is for a swap.  Here they are:

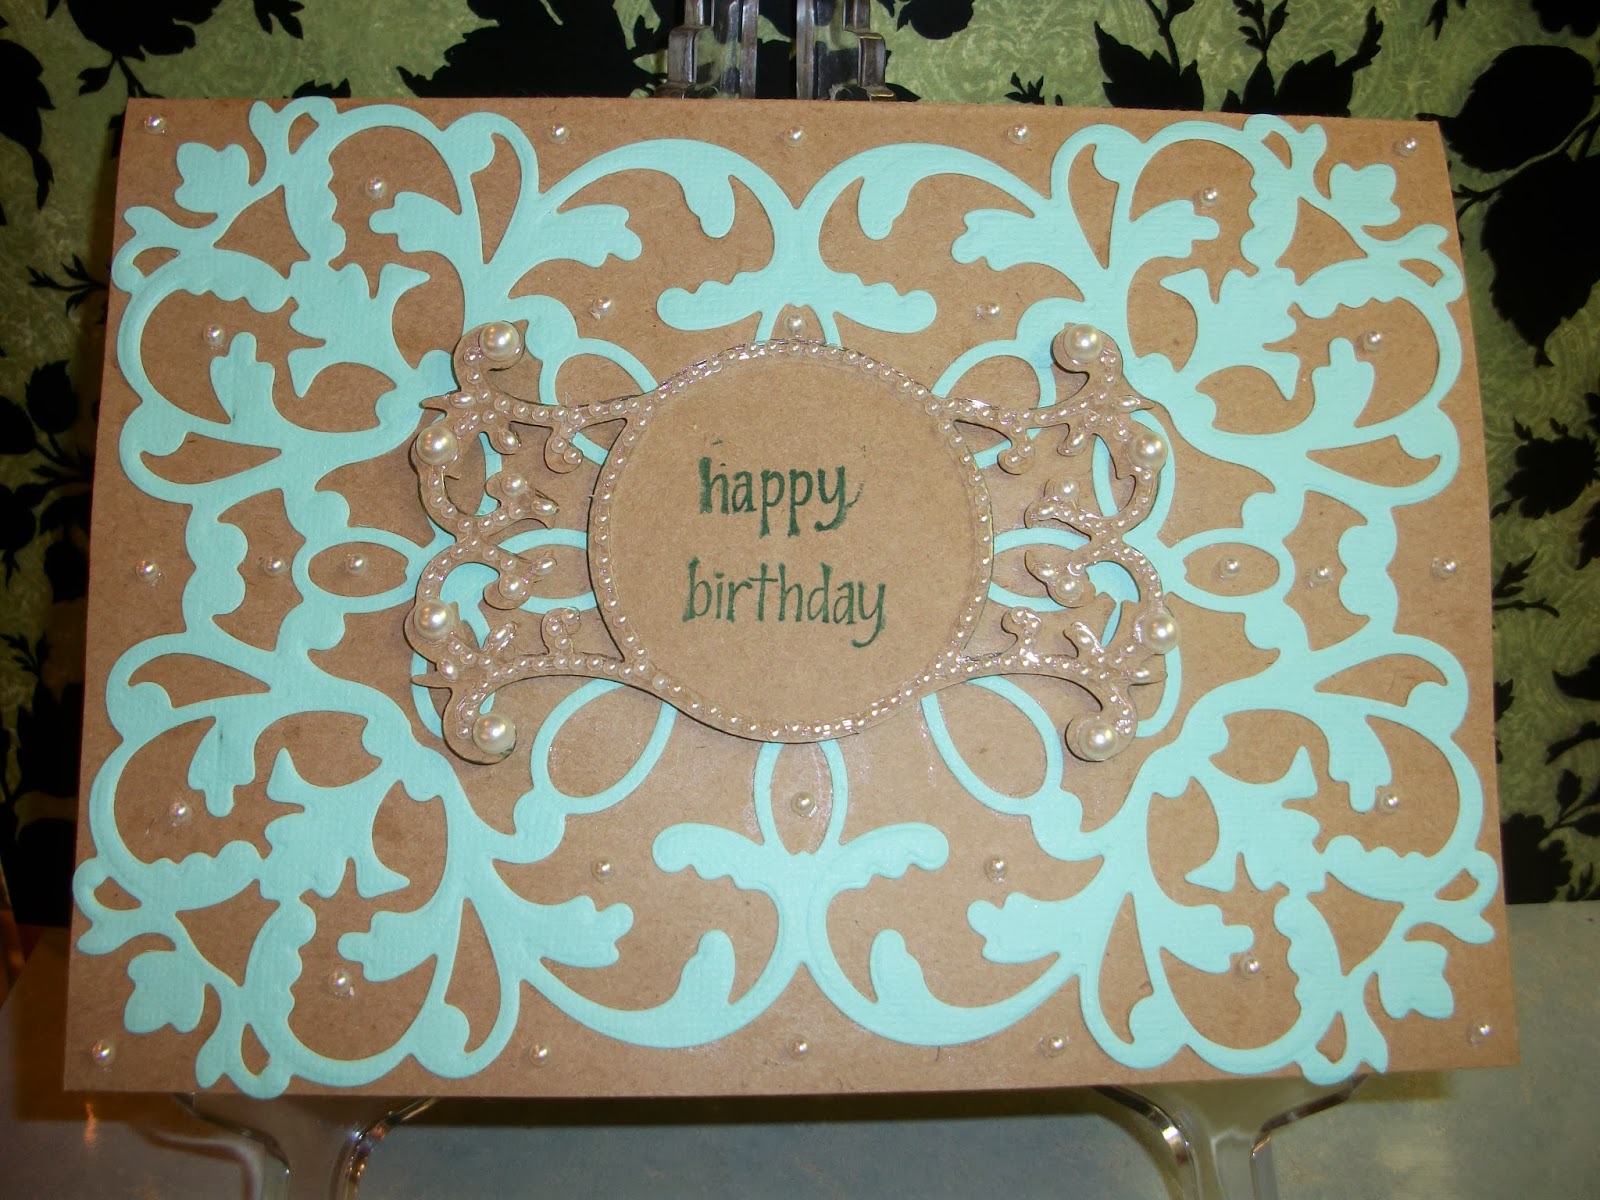
Card Camp Challenge #5 
use 3 die cuts and a Embossing  Folder

I used Spellbinder Grand Nestabilities Ovals, Leaf Dies, and Fancy Tag die.
The EF is from Spellbinders M-bossibilities and is called "Regal".
Flowers are from Prima Flowers and and Yellow flat back Bling is from Hobby Lobby their brand.

NEXT UP

Secret Sweetie Easter Swap
The bunny is called "Bart Bunny" and was a freebie from Robyn's Fetish Store.  She has some cute stuff. Die cut frame is spellbinders "replendent rectangles".
The eggs and tiny flowers are stickers I had for ages, the felt flowers are from Hobby Lobby their brand. 
All paper is from Color box. Made simple step card and decorated it up. Very colorful and springy!

Well it's getting late here and time to put myself in bed.  Will be back tomorrow with few more cards from the table that aren't quiet done yet but will be tomorrow sometime.  Thanks again for stopping by.

Have a wonderful night.

Until next time,
 don't let the bedbugs bite...................

Tuesday, February 26, 2013

Another Follower :)

Hello everyone, just popping in to send a big shout to my new follower and say Thanks for stopping by and following my blog.  Hope you find it fun and come by often.  And don't forget I love getting all your comment Love. 

Well gotta run but do stop by tomorrow for another fun card and maybe even more than one if I can find the time to finish up some others.  Have a fabulous day.

Until Next Time
 Tootles

Monday, February 25, 2013

Cowgirl Card

Evening Peeps.  First I must give a big warm welcome to 3 new followers. Hope you will visit often and get some inspiration while visiting me. Thanks you for following and I will reciprocate and follow you too. :)

Now I wanted to share this card I made with one of Sherri Baldy's Besties images.  I have a friend who is all about country and wears her cowboy hat all the time and her birthday is this week so I had to color this little beauty up.  I am also entering her in some challenges too, why not right!  I colored the digi with Copics and used some patterned paper I've had around so long I had forgot I even had it. I printed the phrase and  the border and cut out. Added some pink and silver brads to the opposite corners.  Found some twine and decided to add a Lasso. It still needed some pop so I made up a paper flower and added a brad in the middle to match. Then of course I thought it needed some bling so out came my big bag of bling.  I put bling rhinestones at the bottom left corner and on her belt buckle and also on her spur.  OK I think it's done now.  And I just know my Friend Kim will be pleasantly surprised with her card. 

I have really fallen for these images by Sherri Baldy.  They are just awesome to color up!  Hope you enjoyed stopping by and do come back , ya hear.  Sorry got caught up in the moment....LOL!

Have a wonderful evening all!  Here are the challenges I am entering this card in:
Bestie Challenge #7 - use a Bestie digi and 2 patterned papers

Card Camp (Yahoo Group) - use something you have not used in 1 year from your stash (my papers)

Created with Love - Bright & Cheery

613 Avenue Create - Anything goes

Daisy Doodle Challenges - Anything Goes

Creative Card Crew - #30 Birthday

Celebrate the Occasion - Girl's Birthday

Digital Tuesday Challenge - Birthdays & use a Digi

Party Time Tuesday - Anything Goes 

Sunday, February 24, 2013

My Stamping Shack Blog Project

SCORED LATTICE CARD

Hello Everyone.  I'm here with another fun DT project for Stamping Shack Blog.  Today I am showing you how to create a Scored Lattice Card.  So let's get going with it.

Here are the supplies you should have on hand:

Scor-Pal® OR Crafters Companion
Card stock
Printed Digi Stamp Image
Markers or Color Pencils
Die cut machine and die of your choice
Adhesive of your choice
Embellishments of your choosing

1. Get your card stock choice for card out and set aside.
2. Measure and cut base mat card stock, of your choice.
 
3. Now using your  Scor-Pal®, lay paper good side down on board, score the base mat piece at the 1/2 " mark, do this to all four sides. You now have a border all the way around.  We will create the lattice look inside this border.


4.  OK, now align opposite corner points on the Scor-Pal® or Crafters Companion and score lines up and down at 1/2" intervals, staying with in the square border.  Flip the card stock to opposite corner points and do the same thin.  This will give you the lattice look.


5. Flip paper over to see your lattice look background piece.  Now we need to attach the background lattice piece to your card base. Use your favorite adhesive and attach. 


6. Print out and color your digi image on cardstock.  I used a new up and coming image from The Stamping Shack Store found in the Orange Bird Studio Range.  I colored my image with color pencils and used a corner rounder punch on all for corners of my image.


7. Now just put your card together with all your fun embellishments.  So here's how my "Lattice Card" came out.


That's it for today folks. Have a beautiful Sunday!  It's gorgeous here today, thinking I'll get MIL out for a nice walk in the sun.

Until Next Time,
 Cool Carding

Thursday, February 21, 2013

What are you working on?

Afternoon everyone.  Well wanted to have something ready by today to show, but as life has been keeping away from my crafty spot.  So I thought I'd share what's on my craft space today.  It's a bit messy because I have several projects going at one time all the time......So here's whats on my craft counter today, LOL!  Look closely and you'll see the card I rec'd today from a sweet online friend, Linda K.  It's a Bestie Image by Sherri Baldy, a cute little mermaid in teal.  Thanks Linda, I Love It.


OK. So any ideas what I'm working on?  There's several projects happening in there.  I usually lay stuff out all over my area and walk by it trying different thing until I get something I am happy with then put it all together.  Well really just didn't want to be gone from here to long. Have a fun rest of your day and show me what's on your crafty counters..... :)

Until Next time,
Crafty Hugs