Wednesday, January 30, 2013

A few Valentine's

Hi there, just popping in to post some Valentine's I made today.  So did I do alright?  

 Entering this little cutie into the following Challenges:

Challenges 4 Everybody - Anything Goes
Mark's Finest Papers - Draw frame around your image


That's it for me today.  Gotta run dinner is waiting to be made.

Until next time,
Keep Calm and Craft On

Tuesday, January 29, 2013

Tuesday Color Challenge & a RAK

Evening all.  Made a few cards today. The 1st was for the Outlawz Group, Tuesday Color Challenge.  I was in the mood to play with my rubber stamps a bit today.  Here are the colors for this week, and the inspiring hhoto is way to cute, don't you agree?
 And so here is what I came up with, the inside has a verse about Friends. 
But I still needed to have some cards on hand to send as RAKS (Randon Acts of Kindess) to friends in several different Groups I belong too.  I still need a few more but at least I started on them right.  Well here is one, it will be going out as a February Rak in a day or two.  I like it a lot, simple but fun. Here it is:
That's all I have for this evening.  Hoping to get more Valentines and RAKS done this week.  I do have to work tomorrow and Thursday mornings, but I still hope to get more done, time permitting.  Have a wonderful night and thanks for stopping by.

Until next visit,
Tootles

Monday, January 28, 2013

Happy Monday

Hello all.  First off I want to send out a big warm welcome to my newest Follower and Thank her for the comment love too.   I made my 1st Valentine of this year this morning.  It's going to a Card Making Friend who simply adores Owls.  It was fun to make and I really am pleased with the outcome, what do you all think?

Well time for lunch here.  Taking MIL out today to a local eatery, to nice to be inside today.

Until next time,
Happy Card Crafting

Sunday, January 27, 2013

Post It Note Cover & Pen holder

Hi Crafters,
So Happy your stopped in for a visit today......  My project today is also my blog project for The Stamping Shack Blog where I am a DT Member.  This cute post it note & pen holder ... Super easy and a really fun project to make. I am using the "Hippie Goth Girl" Digi Image from the Stamping Shack Store.  She can be found Here.  And I decided she is my favorite image thus far to use.

 Tip : The measurements will depend on what size your post it notes are...  Mine are:  3" X 3" ... I also applied  sticky strip to the back side of my  post it notes  to adhere to the inside of the holder.


Supplies

  • Paper trimmer
  • One 4" x 7" piece of card stock
  • Three 3 3/4" x 3" pieces of card stock
  • Three 2 3/4 " x 3" pieces of patterned paper
  • One ¼" x 1" piece of card stock
  • Two 5" lengths of ribbon
  • One small pencil or pen
  • Post-It notes
  • Sticky Strip or other strong adhesive
  • Bone folder
  • Scissors
  • Digi Stamps, ink, Color Pens or Markers of your choice, & embellishments

Step-by-Step

  1. Step 1

    Score the 4" x 7" card stock across the wide side, 3 " from either end.

  2. Step 2

    Fold card stock along these score lines to create a ½"  center Spine.

  3. Step 3

    Mat all 2 ¾" x 3" pieces of patterned paper by adhering to the 3" x 3 3/4" cardstock pieces.

  4. Step 4

    Adhere one of the matted pieces onto the outside, front of the holder.
  5. Step 5

    Center two pieces of ribbon inside the holder and adhere with Sticky Strip.  


  6. Step 6

    Adhere the other two pieces of layered card stock over the inside panels to cover ribbon ends.
  7. Step 7

    Remove backing from Post-It notes stack and adhere to the bottom right side of the holder I also added a strip of Sticky Strip to back of Post It to hold in place better.

  8. Step 8

    Take the ¼" x 1" piece of card stock and wrap it around your small pencil or Pen to create a loop.  Adhere ends together.

  9.  Adhere the card stock loop at the base of your holder next to your Post It Pad.

  10. Step 9

    Close the top, and tie closed with the ribbon
  11. Step 10

    Decorate the top with your printed out and colored Digital Image and any other embellishments you'd like.  I added some text that I printed and matted to card stock before attaching to front with Sticky strip.


I am also entering this into the weekly Color Challenge over at Outlawz Group.
The colors this week are: Electric Orange. Cherry Pink & Haute Pink and the twist was to use squares somewhere in your project.  I believe I made the requirements and I am very happy with this Post It Note Cover! :)

That's all I have for you on this wonderful Sunday, enjoy your day.  Don't forget to leave me some blog sugar..... I love reading all your sweet comments.

Until next time...
Happy Crafting!!

Wednesday, January 23, 2013

Stamp of the week at The Stamping Shack

This week at The Stamping Shack's Facebook page we have a Digi stamp of the week special and it will be on special til next Tuesday.  The digi image for this week is called "Arty Girl" and can be purchased on the stamping shack store .  I made a sample item with this cute Arty Girl image.  I decided to make a Neat Bag Topper for a sleeve of stamps I am giving to a friend.  I just printed the image on cardstock and colored it with color pencils and OMS. Then stamped the text (from Just Rite Stamps) on either side in red .  Then I cut the paper down to fit the top of the stamp sleeve. Also added a couple red gems to top corners.  Folded it over the back and stapled to close it on. I think after looking at it I may add a little more bling gems and maybe a ribbon over the staple, hmm we'll see.  Any way here is the finished item.  Don't forget to stop by The Stamping Shack's Face Book page for more inspiration with this adorable digi image.

Have fun and crafty day!

Until next time,
Tootles

Saturday, January 19, 2013

Another Card for the Color Challenge

Hi all you crafty peeps.  I know I told some of you to come here and see the info on the card I made for the color challenge over at the Outlawz Group, and darned if this computer of my decided to crash before I could get it published yesterday.  So I am trying again to get it up here.  Sorry to all those that came by and found nothing new, but sometimes I think computers have a mind of their own!  Any ways here is the Color Challenge Colors for this week at Outlawz Group.   We had to use Purple, Cream and Leaf green and the twist was to use fibers.  I used Paper Studio Card base in Cream.  Paper studio paper was used for the background papers and cut to size with friskars paper cutter.  I attached papers with glue stick. I stamped the image (Dress form and Stand) from Just Right Stamps and cut them out attached with glue stick them added the Lace oval frame from Recollections embellies.  I then added the little pretty flower and touched the edges with a little purple ink from Studio G.  It still needed something so I added the green and violet gems at the opposite top and bottom corners.  Also lightly dusted the lace frame with the studio G ink. And there you have it.  This is going to be sent to a friend in one of the Card Groups that I belong to as a RAK (Random act of kindeness).  And now for the card.

Well that's all I have for today.  Think I am going to get a little knitting done before I need to start thinking about what to make for dinner.  Oh and I am also teaching my self to crochet, it's harder for me than learning to knit for some reason!!  :)
Have a wonderful Saturday.

Until next time,
Happy Crafting!

Tuesday, January 15, 2013

Here come's the Bride......

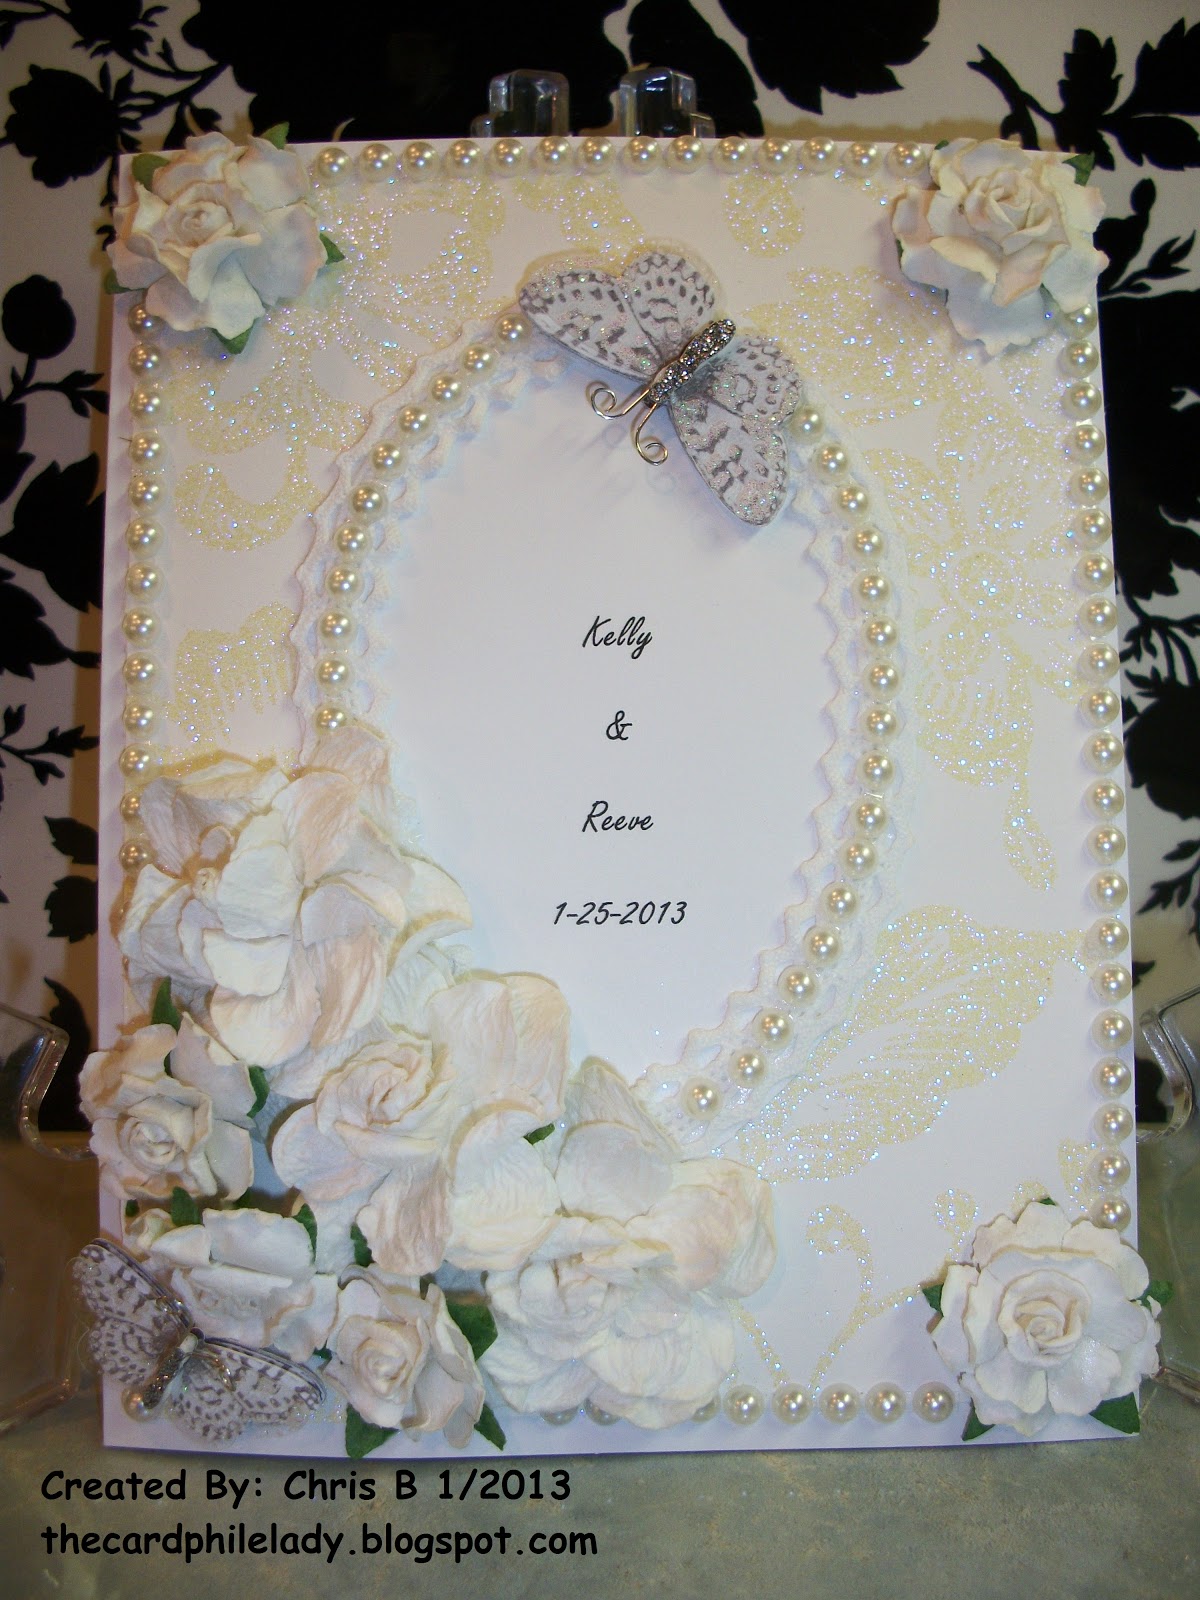
Howdy all....it is so darn cold here today that I actually stayed in my fleece leopard print loungers all day long.  Figured what the heck at least I'm warm.  It never got warmer than 37 here today, BRRR that's what I say.  So I did a little house work, and then decided to tackle a wedding card I need for next weekend.  I had an idea all worked out in my head and I must say I am pleased with the end result.  This card is made with white card base then I cut to fit  the front of card some shimmery floral designer paper that I bought at Hobby Lobby but there's no manufacture on the back, Sorry.  And all the embellishments are from Recollections, lace frame, flowers, butterflies and pearls.  Just glued everything in place after playing around with the layout abit.  So what do you think of it, I'd love to hear what you all think......  :)
Drum Pleeasse........


OK now that I've shared this beauty with you all I am going to enjoy the wonderful fire my husband built for me in the fireplace......have a wonderful evening.

Until next time,
Tootles.....................

The Stamping Shack's 1st 2013 Challenge

Hi, It's that time, time for The Stamping Shack's 1st Challenge of 2013.  The theme for this challenge is Child's Play.  Stop over to the blog and see what the other design team members created to inspire everyone.  I created this sweet card for My mom to send to her Grand nephew due any day now.  I used the image called "Wizard Boy" and you can find him here in the Stamping Shack store.  I colored the image with colored pencils after printing and cutting him out.  Added some patterned paper, twine and some bling stones in brown and printed the phrase about lil boys from a very popular nursery rhyme.  And now here is the card.  I am pretty happy with it since I don't ever have cause for making stuff for children.

Well that's it for today..............

Until next time
Tootles

Sunday, January 13, 2013

Digital Art Necklace Charm

Hello and a warm welcome back from the Holidays.  I am back, sorry it's been a bit, but things are back to normal and I am ready to Craft!  So a while back when I went to a craft convention I purchased this fun ART JEWELRY KIT. It's from Craft Fantastic.   I have been wanting a reason to try it out and I was up next to do a Post a project on The Stamping Shack Blog so here is what I came up with.  Here are the most of the supplies you will need to make this:

*Bezel Tray                                                  *Digital Image
 (printed out on
  card stock to 3/4" x 3/4")
*Fantastic Glaze
*Wax Paper scrap
*Jeweller's dots
*Q-tip
*Paper Trimmer


 Print your chosen image out at 3/4 x 3/4 of inch, I chose "ARTSY GIRL" from Lilliput's Range at The Stamping Shack Store, then attach a Jeweller's dot to back of image and set in Bezel Tray.  Push it in so it stays put, see picture below.

OK now take the small glass piece and put a nice puddle of fantastic glaze on the back.  I layed mine on a piece of scrap wax paper for easy clean up .  Let the glaze set up a bit it should fill all corners and be tacky.  Then take a dampened Q-tip and clean up the edges of the glass piece.  
 Now pop the glass piece in to the Bezel Tray that has the image in it.   Hold in place for few seconds.  If any of the glaze oozes out just clean up with the wet Q-tip. Let set up for 10 - 15 minutes on the wax paper and add to any type necklace you like.  Just a little note, I chose to use the image with out colouring it in, it looked much better this way to me. The glass piece actually magnifies the images a bit.  But you can colour it in should you chose to, my old eyes could not manage it well enough on such a tiny image size.  And here is the finished Charm ready to put on a necklace of you choice.

Sorry for the pictures not being so great, I kept getting a lot of glare.....
Well that's all I have for you today.  Hope you liked this easy fun project.  Have a wonderful Sunday and Thanks for stopping by.......

Until next time,
Tootles

Wednesday, January 9, 2013

Birthday Card and Clor Challenge all in one

Hi everyone and thanks for stopping by.  I wanted to join in the fun over at the Outlawz Color Challenge this week and I was in need of a birthday card for a girlfriend.  So I made one card to fit both!  The color choices this week for the color challenge are:

Soooo, here's what I came up with, this is a simple card but very girlie!  I think that the punched border and the bling will pass for texture. At least I thought it did anyway!  It's my friend Kathy's birthday today and we are going to a small get together at the local pub this evening for drinks and celebrating.  I also made her some of my handmade soaps, lotion and shower gel in her favorite scents.  I am only hoping the rain lets up a bit before we have to head out, I hate driving in rain.......
That's all I have for today.

Until next time
TTFN

Thursday, January 3, 2013

Getting things back to normal!

Hello and Happy 2013 to all of you who visit here.  I am happy to say we had a wonderful Holiday and a nice New Year's. Hoping you and yours had a great holiday season too.  I am finally feeling like things are getting back to normal.  Been busy UN-decorating the house today, it's the first chance I've had with all the Pet Sitting visits I was doing.  But need to take a break so I wanted to share a cute CAS Card I made for the TUESDAY COLOR Challenge over at the Outlawz site.  The Color scheme this week is:  Lt Blue, Mellon and Lt Turquoise.  And we have to add some twine.   I used a free image from a sheet of ephemera from the Gecko Galz.  You should go by and grab your free sheet too.  They have some really cool images.  So here is my card, it's also going to be my Step Dad's Birthday Card too.  I think he will like it a lot. 


Also going to enter this in a few challenges listed below.